The body of the dulcitone was in pretty poor condition, but pretty much intact. A rather nasty hairline crack was remedied by sinking very long thin dowels down the one side to reinforce the frame. All parts that could be removed (such as the lid) were separated from the rest of the body and completely sanded down with cracks and gouges filled and corner chips refashioned with small shards of wood. The body itself was sanded down to remove the years of caked on dust, random swipes of enamel paint, and corroded varnish.
Several runs of aerosol insect killer and turpentine were aimed at all suspicious woodworm holes.
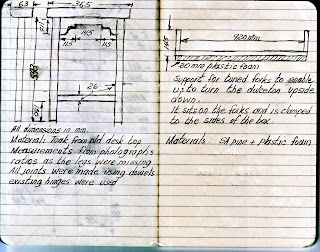
The legs needed to be rebuilt, along with the brackets that attached them with a hinge to the base of the instrument.
Online photos of intact models were used to calculate the approximate dimensions.
The original legs were fastened to the dulcitone base with some rather nifty thumbscrews which also enabled relatively easy release to fold them under the base, allowing for storage or transportation. The small remaining fragment of thumbscrew gave enough away to convince us that screws and threads like this simply did not exist anymore and it would be better to replace them with something brand new that at least functioned in the spirit as the original.
This took a couple of attempts to get right. Included below are both the first attempts and the final mechanism.
First prototype using wing-nuts
Final version with silver soldered nuts and bolts
Sadly the wing-nut version could not be used as there was not enough clearance for the heads. Oblong threaded washers were sunk into the dulcitone base to complete the mechanism.
Thumbscrews installed
In jobs like these, the jigs you use are often just as important as the finished product. The more time spent making the correct bracket to hold something in place, the more likely you are going to be successful in your endeavors. We built a number of jigs and purpose made tools to make our lives easier. These included:
- a little mounting bracket to place the snapped off tuning forks in order to test the spring steel fork holders we were making,
- a little felt tipped hammer to strike the forks to test them when the keyboard was removed,
- drill guides in order to sink very long dowels into the dulcitone body for reinforcement
- and this simple but effective foam lined bracket that allowed us to turn the whole instrument upside down so as to work on it with out disturbing or otherwise straining any of the delicates.
EDIT: Parts 1,2,3,5 and 6 of this story


No comments:
Post a Comment